Debugging Zynq UltraScale+ MPSoC (Cortex-A53 and Cortex-R5)
gdbforge is a Vim-inspired GDB terminal UI for Xilinx Zynq UltraScale+ MPSoC development. Lua scripts under lua/mpsoc/ spawn J-Link GDB Server or OpenOCD + Digilent JTAG-HS2, attach with target remote, load your ELF, and set breakpoints — the Code pane stays usable while the probe runs in the background.
Scripts live in two folders (copy what you need into .gdbforge/lua/):
| Directory | CPU | Workflows |
|---|---|---|
lua/mpsoc/cortex_a53/ |
Cortex-A53 | Bare-metal, Linux kernel attach |
lua/mpsoc/cortex_r5/ |
Cortex-R5 | Bare-metal, OpenAMP / remoteproc |
Demo — Cortex-R5 / J-Link
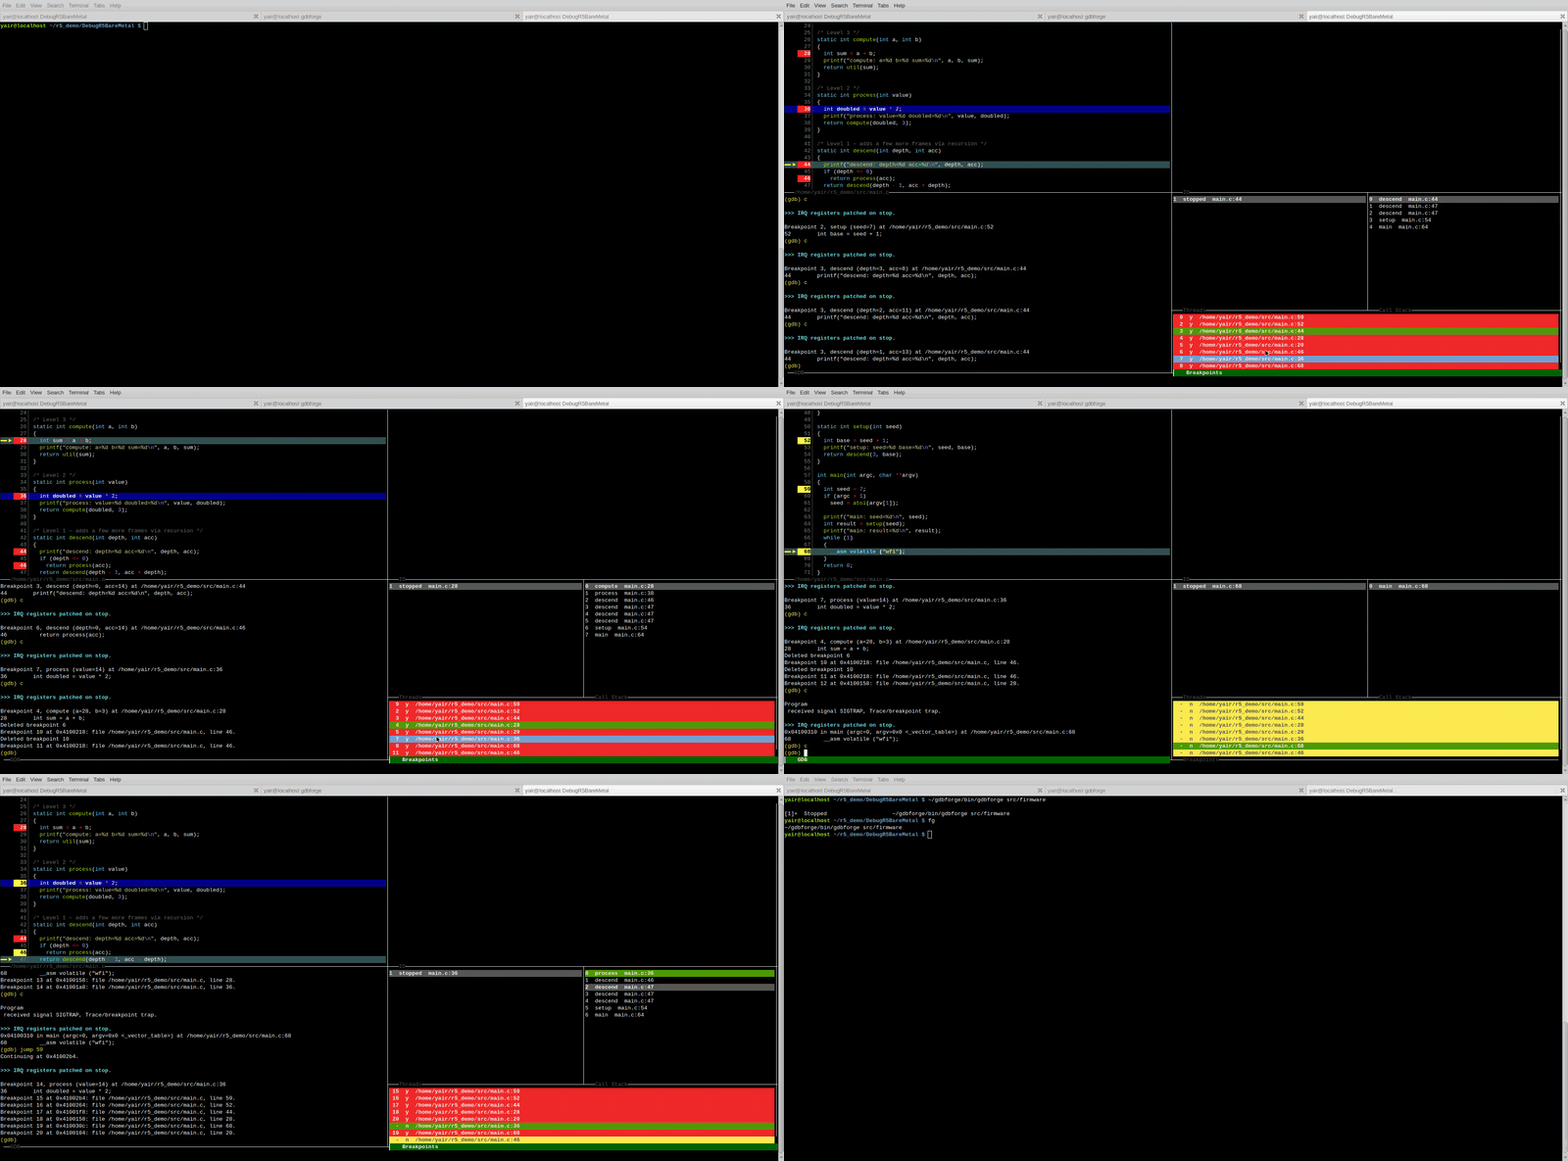
Cortex-R5 / J-Link — multi-pane UI stepping a deep call stack (gdbforge.spawn → JLinkGDBServer → attach). Sample: examples/stack_demo.c. Watch on YouTube.
Zephyr on the R5
examples/zephyr_cortex_r5/ is a ready-to-build Zephyr application for the same core: a main loop, two worker threads, a mutex-guarded struct and a recursive call chain worth a backtrace, configured for the zephyr profile so RPU threads show up in the Threads pane. It builds against upstream kv260_r5 on an unmodified Zephyr tree, and a snippet picks the console — -S jtag-console for SEGGER RTT over the probe, -S uart0-console for PS UART0. Its build.sh will either adopt a Zephyr you already have (init --use <dir>) or fetch one (init --download), then build -c jtag|uart0 and debug.
Prerequisites
| Need | Why | Check |
|---|---|---|
| gdbforge installed | — | gdbforge -version (install) |
| A cross GDB for the core you are debugging | The host gdb cannot debug A53 or R5 code. Cortex-A53 is AArch64 (aarch64-none-elf-gdb); Cortex-R5 is 32-bit ARM (arm-none-eabi-gdb) — the scripts run set architecture aarch64 and set architecture arm respectively |
aarch64-none-elf-gdb --version |
| J-Link software or OpenOCD ≥ 0.12 | Serves GDB over JTAG | JLinkGDBServer -v / openocd --version |
| A JTAG probe on the PS pins | SEGGER J-Link, or a Digilent JTAG-HS2 / Platform Cable for the OpenOCD and xsdb paths. A PL-only chain has no DAP |
lsusb |
Your ELF built with -g |
Source-level debugging needs DWARF | file your_app.elf |
| USB permissions | Probes need udev rules on Linux | no "permission denied" from the server |
| (optional) a clone of the gdbforge repo | The lua/mpsoc/ scripts already ship inside the binary — clone only to edit them locally (precedence) |
— |
| For bare metal: a parked board | Nothing has run psu_init, so there are no clocks and the A53 is below EL3. See Before you attach — this is the most common reason a load "works" and then nothing happens |
xsdb on PATH |
For the *_kernel_* / *_openamp_* scripts: a normally booted board |
Those attach to running Linux, where JTAG boot mode is exactly wrong | board at a Linux prompt |
Point gdbforge at the cross GDB with -d:
gdbforge -d arm-none-eabi-gdb ./your_app.elf        # Cortex-R5
gdbforge -d aarch64-none-elf-gdb ./your_app.elf     # Cortex-A53
Quick start — Cortex-R5 + J-Link, to your first breakpoint
# 1. Park the board first — bare metal only (see the next section).
#    The script is bundled in the binary; no repo checkout needed.
gdbforge --run-script zynqmp-park-el3.sh -p <platform>/hw/psu_init.tcl --jtag jlink

# 2. Point at the J-Link GDB server and pick the RPU core
export GDBFORGE_JLINK=/opt/JLink_Linux_V914a_x86_64/JLinkGDBServer
export GDBFORGE_R5_CORE=0

# 3. Open your ELF with a 32-bit ARM cross GDB
cd /path/to/your/firmware/build
gdbforge -d arm-none-eabi-gdb ./your_app.elf
r5_baremetal_jlink and its r5_target.xml ship inside the binary, so there is nothing to
install. Copy the folder into ./.gdbforge/lua/ only if you want to edit it — project-local
scripts win over the embedded catalog (see Lua API):
mkdir -p .gdbforge/lua
cp -r /path/to/gdbforge/lua/mpsoc/cortex_r5 .gdbforge/lua/   # keep the whole folder
Then, inside gdbforge:
The script kills any stale JLinkGDBServer, spawns a new one in the background, waits for
its port, then in :b gdb runs set architecture arm, applies the bundled
r5_target.xml, target remote localhost:2334, monitor halt,
zeros the TCM, load,
set $pc = 0x0, and break main.
It stops there. The core is halted at the reset vector with a breakpoint pending on
main — the script does not continue for you. To reach your first breakpoint:
- Press c (or type
continuein:b gdb). Execution runs tomainand━━▶marks the program counter in the Code pane. - Move the cursor to any line and press Space to add another breakpoint.
- n steps over, s steps into, f finishes the frame. The Call Stack and Threads panes refresh at every stop.
:b gdbis the real GDB console for everything else (info registers,x/16x $sp, …).
If the script stops early it prints the reason in the Lua pane; :b exec shows the J-Link
server's own log. Every script also defines help() describing its environment variables
and assumptions. When a load succeeds but the application produces nothing, read the next
section before anything else.
Before you attach: park the board (host side)
Bare-metal bring-up has a prerequisite none of the :lua scripts can satisfy: the PS must already be initialised, and on the A53 the core must still be at EL3. A board that booted normally is neither, which is why an app can load cleanly over JTAG and then produce nothing at all.
Cortex-A53. The Xilinx standalone BSP is built EL3=1 / EL1_NONSECURE=0, so boot.S has exactly one entry path. It reads currentEL and sends anything else to b error — a two-instruction spin reached before _startup and main, with no UART output, which reads as a bad ELF or a broken probe. GDB cannot undo it: a core cannot raise its own exception level, and load / set $pc run at whatever EL it is already at. FSBL and ATF do run at EL3, but ATF hands U-Boot down to EL2, so by the time there is a U-Boot prompt to halt at, EL3 is gone (p/x $cpsr reads 0x200002c9, mode nibble 9). The answer is not to boot the board at all.
Cortex-R5. Exception levels do not apply, but the same boot decision does: with no FSBL, nothing has configured the clocks, PLLs and MIO, so the app runs with no UART, and nothing has released the RPU from reset either.
flowchart TB
  subgraph normal ["Normal boot - too late to debug bare metal"]
    BootROM1[BootROM reads mode pins] --> FSBL["FSBL - psu_init, EL3"]
    FSBL --> ATF[ATF - EL3]
    ATF --> UBoot["U-Boot - EL2 (cpsr mode 9)"]
    UBoot --> Spin["app loads, boot.S hits b error, spins silently"]
  end
  subgraph parked ["zynqmp-park-el3.sh - JTAG boot mode"]
    BootMode["USE_ALT set: ALT_BOOT_MODE = JTAG"] --> Reset[rst -system]
    Reset --> BootROM2[BootROM runs no bootloader]
    BootROM2 --> PsuInit["xsdb sources psu_init.tcl over the DAP"]
    PsuInit --> Park["A53 reset and halted - EL3 (cpsr mode d)"]
    Park --> Attach["gdbforge attaches, load, run"]
  end
scripts/zynqmp-park-el3.sh produces the second of those two states: it sets USE_ALT in CRL_APB.BOOT_MODE_USER so the BootROM takes JTAG as the boot mode, issues a system reset so no FSBL, ATF or U-Boot runs, sources your psu_init.tcl against the PSU target (not a core — after a system reset the A53s are in APU Reset and every read-modify-write in psu_init fails), and leaves the chosen A53 halted at EL3 with the clocks up. For R5 work the psu_init half is the part that matters; the parked A53 is incidental.
Run it from a shell, before gdbforge, with no debug session open:
scripts/zynqmp-park-el3.sh -p <platform>/hw/psu_init.tcl               # Digilent / Xilinx cable
scripts/zynqmp-park-el3.sh -p <platform>/hw/psu_init.tcl --jtag jlink  # SEGGER J-Link
It starts its own hw_server and stops it again before it returns, so the cable is free for gdbforge as soon as the summary is printed — no pkill hw_server in between. A hw_server that was already running when it started is left alone, and the summary then says so and how to release it.
The script also ships inside the binary, which is the way to reach it when gdbforge was installed as a release build rather than cloned:
gdbforge --list-scripts                                                   # what is bundled
gdbforge --run-script zynqmp-park-el3.sh --help                           # its own options
gdbforge --run-script zynqmp-park-el3.sh -p <platform>/hw/psu_init.tcl --jtag jlink
Everything after the script name is passed through untouched, and no TUI or probe server is started. Bundling changes nothing else: xsdb still has to be on PATH, and the cable rule below still applies.
It is a separate script, and gdbforge cannot run it for you: it drives xsdb, which needs hw_server to own the JTAG cable, and openocd or JLinkGDBServer is holding that cable for as long as a session is open. Sharing does not fail cleanly — small transfers get through and a bulk one corrupts with ftdi_read_data returned 69, expected 70.
Which cable — --jtag digilent or --jtag jlink
hw_server only drives cables AMD ships a driver for: the Platform Cable USB II and the Digilent FTDI modules, which covers the JTAG-HS2/HS3/SMT2 dongles and the ones soldered onto the ZCU10x boards. That is the default, --jtag digilent, and it needs nothing extra.
A J-Link is not one of them, and plugging one in does not make it appear in jtag targets however it is wired — hw_server never looks for it. It can still be used, through Xilinx Virtual Cable. XVC is a small TCP protocol that says no more than "shift these bits through the TAP", and hw_server speaks it as a client, so anything serving XVC becomes a cable it accepts. SEGGER ship exactly that server with the J-Link tools, as JLinkXVCDServer:
Nothing above that socket can tell the difference: the PSU and A53 targets enumerate, psu_init's DAP writes land, rst -system resets the chip. It is only slower, because every JTAG shift becomes a TCP round trip, so expect psu_init to take seconds rather than milliseconds.
--jtag jlink starts JLinkXVCDServer unless something already serves --xvc-url (default TCP:127.0.0.1:2542), adds -xvc-url to the xsdb connect, and kills the server again on the way out — but only the one it started, so a server you left running is left alone. Use --jlink-serial <SN> to pick between several probes.
Two J-Link-specific traps:
- The probe has to be on the PS JTAG pins. A PL-only chain has no DAP, so there is no A53 to park and no path for
psu_init. - VTREF must be wired. The J-Link refuses to drive JTAG at all if its reference-voltage input reads 0 V, and fails with
Target voltage too lowbefore the XVC port ever opens — wiring only TCK/TMS/TDI/TDO/GND is not enough, VTREF needs the PS JTAG bank supply (1.8 V on ZynqMP). Check what the probe sees withJLinkExeandShowHWStatus. Larger J-Links can be told to assume a voltage with theVTREFcommand; the small ones answer "does not support setting a fixed VTref" and have to see the real thing.
Either way, the same rule about sharing applies, and more sharply with a J-Link: JLinkGDBServer and JLinkXVCDServer both want the one probe, so the park has to finish and release it before gdbforge starts.
Two things to know afterwards:
- Do not let the debugger reset the target.
monitor haltis fine;monitor resetdiscardspsu_initand leaves a board with no clocks. - The board stays in JTAG boot mode, so it will not boot from QSPI/SD and looks bricked to anyone who power-cycles it and waits for a console. A power-on reset clears it;
scripts/zynqmp-park-el3.sh --clear-boot-modeclears it deliberately.
--help on the script carries the full rationale, plus --no-serdes for boards whose gigabit-transceiver bring-up takes the JTAG session with it, and a CABLES section on the XVC bridge.
This applies to the bare-metal scripts only. a53_kernel_* and r5_openamp_* attach to a board running Linux, where JTAG boot mode is exactly the wrong thing — those need a normal boot.
TCM ECC: why the R5 scripts zero TCM before load
The R5 TCMs are ECC-protected, and a store narrower than the ECC granule is a read-modify-write. Aim one at a granule that has never been written since power-on and the read half finds no valid syndrome, which the core reports as a synchronous parity error data abort — DFSR.FS = 0b11001, and in Zephyr K_ERR_ARM_SYNC_PARITY_ERROR, fatal reason 52.
load cannot avoid this on its own. An ELF's bss and noinit are NOBITS: they have an address and a size but no bytes in the file, so no loader writes them. The first thing a Zephyr app does is arch_bss_zero(), whose very first strb lands on __bss_start — the first address load did not touch — and aborts before main.
Nothing else fills that gap over JTAG. On a normally booted board the FSBL's XFsbl_TcmEccInit writes the whole TCM, and under Linux the zynqmp_r5_remoteproc driver zeroes the TCM carveouts before loading firmware. Park the board with zynqmp-park-el3.sh and there is no FSBL by design, so neither happens.
So r5_baremetal_jlink and r5_baremetal_openocd_digilent write 64 KB of zeros over ATCM at 0x0 between monitor halt and load. The ordering is the whole trick: load then rewrites everything the fill touched, which also resyncs anything gdb had cached for breakpoints in that range. Run it after load instead and it erases the image.
GDBFORGE_R5_TCM_INIT picks the banks. atcm is the default and is enough for an image that fits in ATCM; all adds BTCM at 0x20000, and btcm does that bank alone. Only ask for a bank your image actually uses. BTCM is not always powered or mapped, and writing one that is not there fails silently at the probe, after which unrelated memory access — including inserting a breakpoint — starts reporting Cannot access memory at address …. The scripts verify each write via gdb_query and warn rather than carry on quietly. 0 disables the fill entirely, for firmware that has already turned ECC checking off in ACTLR (Zephyr's CONFIG_DISABLE_TCM_ECC=y) or a core whose TCM someone else initialises.
The r5_openamp_* scripts do not do this and do not need to: they attach without load, to firmware remoteproc has already placed in a TCM it cleared first.
Script catalog
:lua |
Probe | Purpose |
|---|---|---|
a53_baremetal_jlink |
J-Link | A53 bare-metal load + break main |
a53_baremetal_openocd_digilent |
OpenOCD | A53 bare-metal (Digilent HS2) |
a53_kernel_jlink |
J-Link | A53 Linux kernel — JTAG attach, vmlinux + lx-symbols |
a53_kernel_openocd_digilent |
OpenOCD | A53 Linux kernel (Digilent HS2) |
r5_baremetal_jlink |
J-Link | R5 bare-metal load + break main |
r5_baremetal_openocd_digilent |
OpenOCD | R5 bare-metal (Digilent HS2) |
r5_openamp_jlink |
J-Link | R5 OpenAMP attach + load |
r5_openamp_openocd_digilent |
OpenOCD | R5 OpenAMP (Digilent HS2) |
scripts/zynqmp-park-el3.sh is deliberately not in that table: it is a host-side helper run from a shell before gdbforge starts, not a :lua script — see Before you attach.
Environment variables
| Variable | Default / meaning |
|---|---|
GDBFORGE_JLINK |
Path to JLinkGDBServer |
GDBFORGE_JLINK_CHIP |
Chip prefix (XCZU3CG) |
GDBFORGE_JLINK_DEVICE |
Full device override |
GDBFORGE_JLINK_PORT |
GDB port (2334) |
GDBFORGE_JLINK_NORESET |
start JLinkGDBServer with -noreset, so connecting keeps the clocks, resets and PLLs that psu_init set up |
GDBFORGE_R5_CORE |
RPU core 0/1 |
GDBFORGE_R5_TCM_INIT |
TCM banks to zero before load: atcm (default), btcm, all, or 0 for none — see TCM ECC |
GDBFORGE_A53_CORE |
APU core 0–3 |
GDBFORGE_OPENOCD |
openocd on PATH |
GDBFORGE_OPENOCD_PORT |
GDB port (3333) |
Edit defaults at the top of any script, or export before running. Each script implements help() — run :lua <name> and check the Lua pane output.
These belong to zynqmp-park-el3.sh, not to gdbforge, and are read only by that script:
| Variable | Default / meaning |
|---|---|
ZYNQMP_PSU_INIT |
psu_init.tcl for the board, instead of -p |
ZYNQMP_HW_SERVER_URL |
Where hw_server is, or where to start one (TCP:127.0.0.1:3121) |
ZYNQMP_HW_SERVER_BIN |
Full path to hw_server, if it is not in PATH or beside xsdb |
ZYNQMP_JTAG |
Cable kind, digilent (default) or jlink, instead of --jtag |
ZYNQMP_XVC_URL |
XVC server address (TCP:127.0.0.1:2542), --jtag jlink only |
ZYNQMP_JLINK_SERIAL |
Which J-Link, when several are plugged in |
ZYNQMP_JLINK_XVCD |
Full path to JLinkXVCDServer, if it is not in PATH or under /opt/SEGGER/JLink*/ or /opt/JLink*/ |
The A53 kernel scripts stop the CPU through JTAG; for day-to-day kernel work over a serial line or Ethernet, kgdb is usually easier.
See also: Lua catalog — MPSoC · User Guide — Lua · scripts/zynqmp-park-el3.sh (--help carries the full EL3 / psu_init rationale)